Page 6
Updated May 2002
It is getting down to the final two months, but Blair thinks the project can be completed on time. A couple of weeks ago the car went in for final paint, and it will then go directly on for the remaining upholstery. While Richard Chrysler continues to be the main navigator for authenticity and helps Blair weekly with the assembly, the project has a number of contributors whose collective knowledge is making this restoration more successful and on schedule. With the images and text below, Blair takes us through some of the final stages of the restoration.
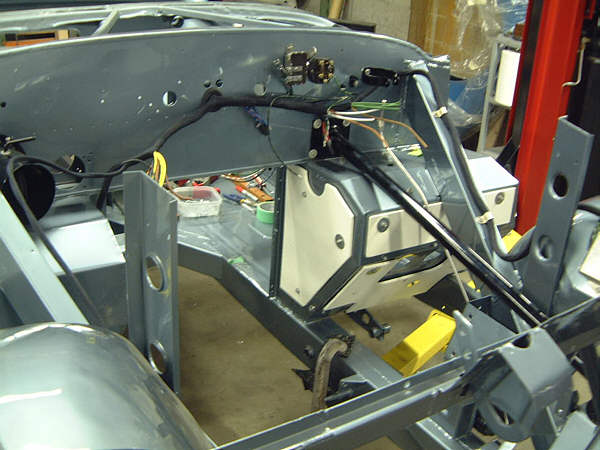
The restoration continues with the addition of electrical components. All of the original mounting holes were used to locate and determine the sometimes unique attachment and shape of the heat shields on the drivers side.
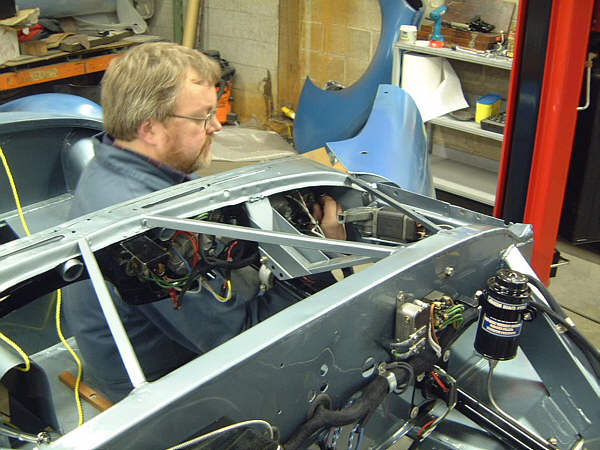
Richard Chrysler savors the moment at being able to stand up and install components and the wiring harness behind the dash with the car positioned on the hoist
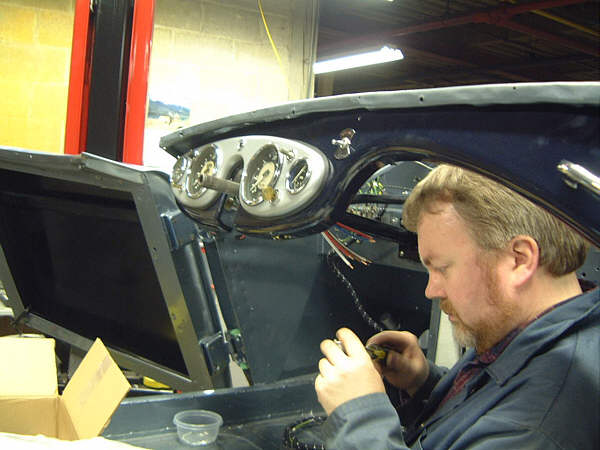
The dash panel and instrument cluster had been painted at the same time as the dash for AHX-14 was done. The restored instruments were installed and set in place and wired.
The early style bulkhead construction with steel angle supports on top allows for good access for building up the cowl area.
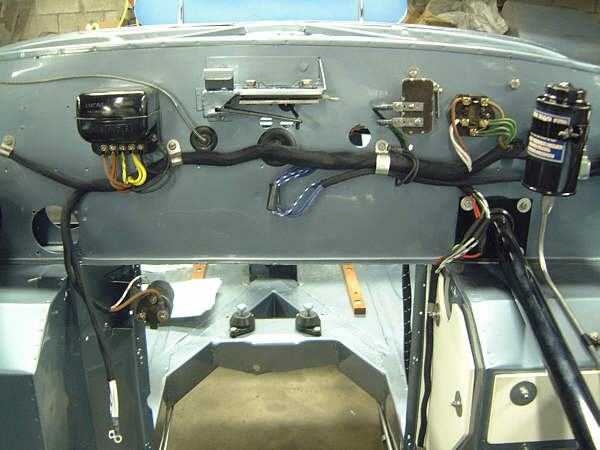
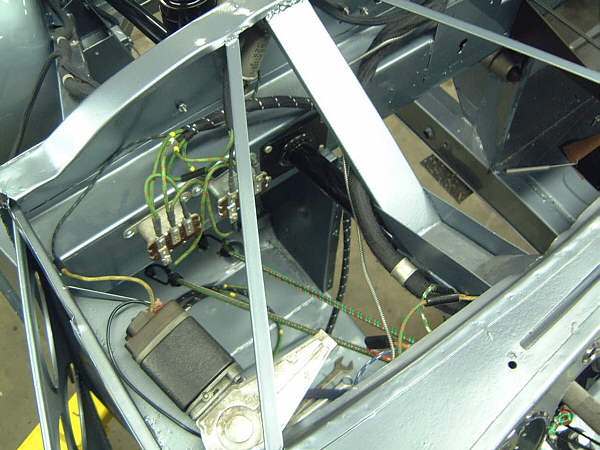
More components are added to the firewall. Every component, nut, bolt, washer and screw is reviewed before being installed. It makes things painfully slow, but we want everything to represent the original assembly of this car. The majority of the fasteners and clips are restored originals. A point of interest, when we used very fine glass bead blasting it was found that the original wiring clips were all zinc coloured, not goldish. They are all mounted with pan head slot screws.
Horns, flasher relay, and some of the hydraulic lines are shown in place.
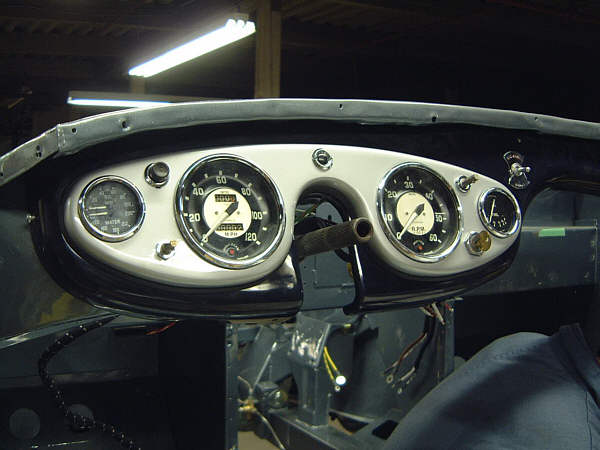
Another look at the instrument panel
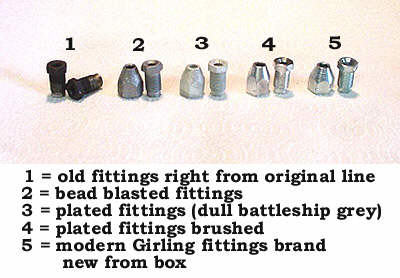
All of the hydraulic and fuel lines were supplied by Doug Reid, aka Mr. Finespanner of 18G Motorworks. He advised us about the differences with the current replacement fittings available and the original BSF fittings. The wrench sizes are different. For this reason it was decided that we would salvage all of the original fittings for him to restore and install on new tubing.
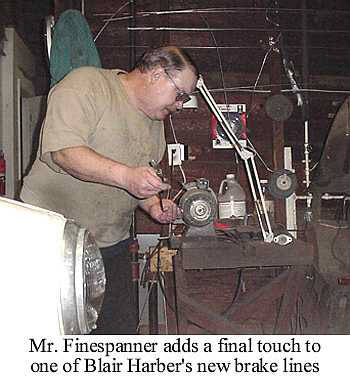
I remember how much work it was to make up the lines for AHX-14 and it was a real boost to the restoration project to be able to install Dougs. They were all a perfect fit, right out of the box. Thanks Doug.
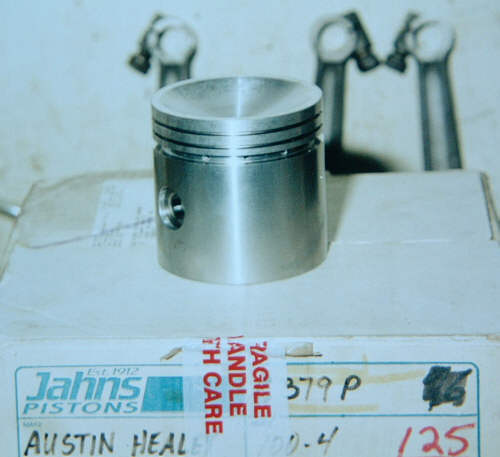
Jim Sebert of Sebert Motors was fortunate to acquire the last set of high quality Austin Healey 100 pistons that Jahns Pistons will be making. Other new engine components are a NOS crank, sump, and camshaft.
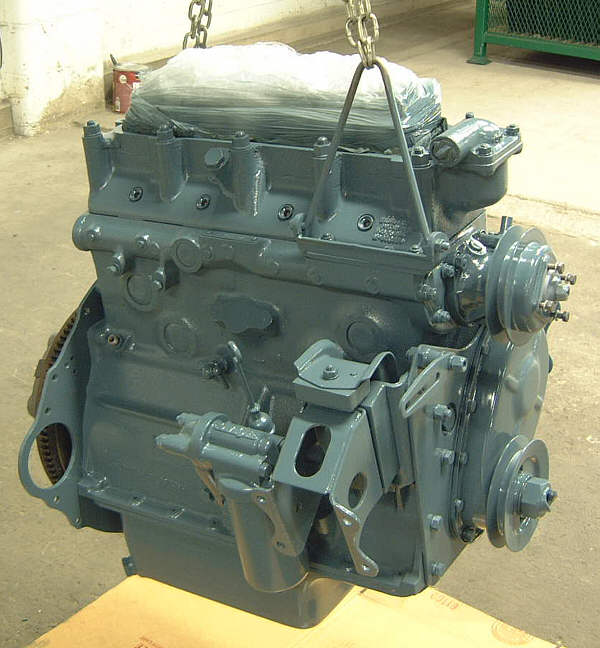
Jim Sebert completely rebuilt the engine and transmission. Before sending it back to me, he ran it on a test stand for approximately 4 hours to make sure that there were no unforeseen problems. The transmission was attached, but with a 28% overdrive.
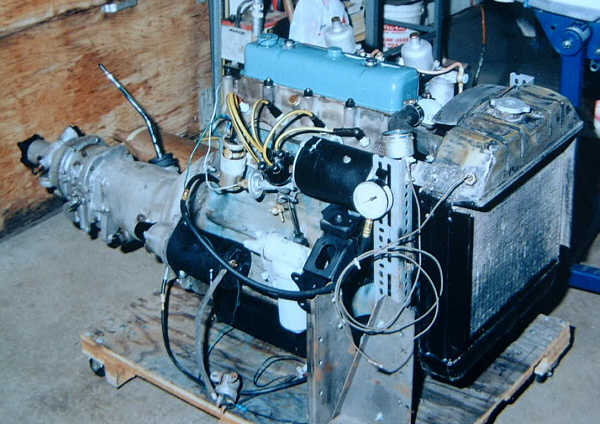
This picture pretty accurately shows the colour of the original engine. It was matched to the original paint on the engine during the restoration of AHX-14.
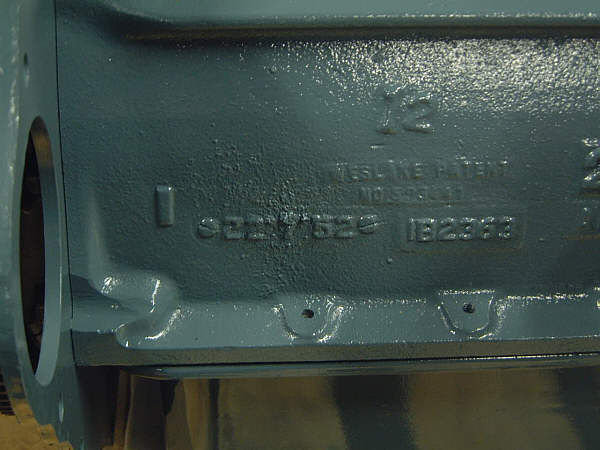
This is the original engine for the car, and carries a cast date of July 22nd, 1952.
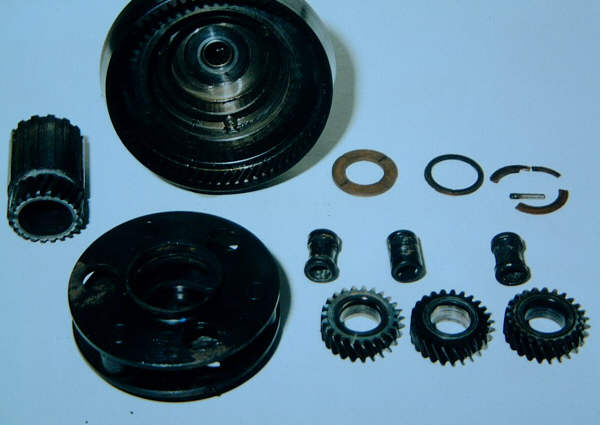
Meanwhile the 32% overdrive for this car had a major problem with the stub shafts for the three planetary gears. All of the gears were in excellent condition, but new components had to be fabricated with hardened bushings and new needle bearings in order to restore the unique original gear set. This was expensive, but we didnt want to miss the opportunity to get this overdrive right for this car.
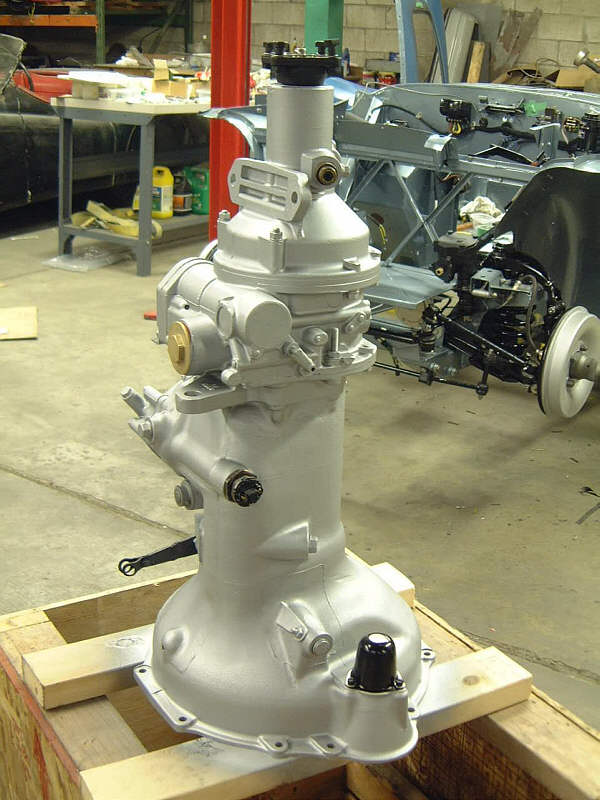
Two weeks later, the transmission and overdrive caught up to the engine and was ready to install into the car.
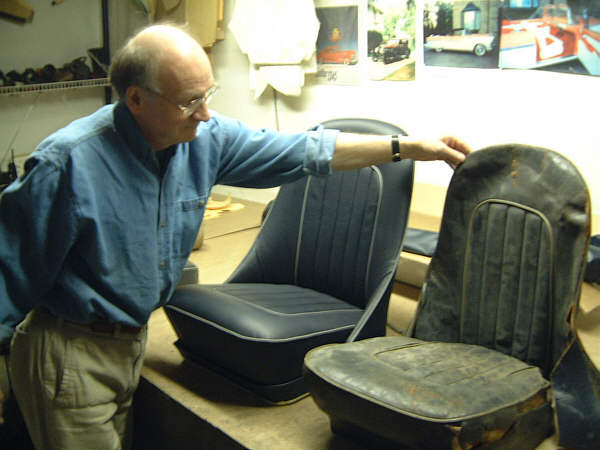
John Smyth has now completed the seats. He compares his seats with a very original seat and explains the important aspects he has duplicated.
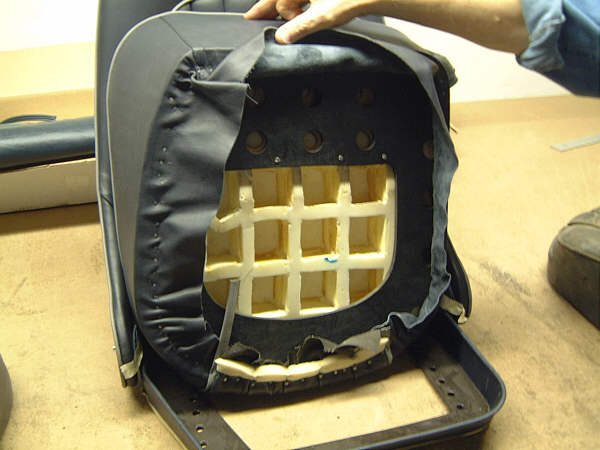
The special modifications and special treatment of the cushions is noteworthy. David Koch from our Southern Ontario Chapter of the AHCOA was very helpful in developing the techniques required to make accurately fitting backing with the original squared cutouts. Thanks Dave.
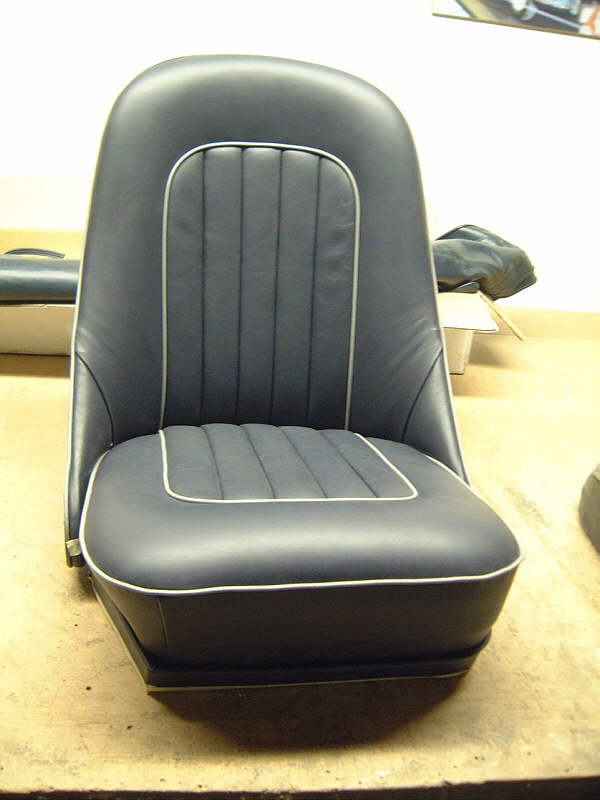
Having the seats completed at this point makes the final
upholstery task much easier to schedule. The seats represent such
a large part of the coach trimming task.
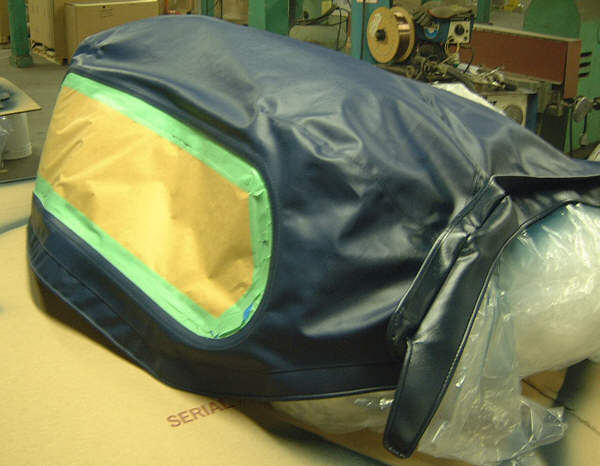
The hood is made by Heritage Trim in British Columbia, Canada. It will be fitted onto the car by John Smyth of Heritage Coach Trimming in Brampton, Ontario. The colour of the hood was more of a royal blue, and had to be re-coloured to be a navy blue which is correct for the car and matches all of the vinyl and armacord for the car. The colour change was quite significant.
Russ Bamsey is another member of AHCSO. He specializes in rebuilding shock absorbers, and he restored the rear shocks for this car. He told me that these early shocks have a smaller valve than the later shocks. They can also be identified by the flat top plate. The shocks for this car were in very good shape Russ told me. Since they were from a southern car (San Francisco area), one of them still showed the stamped production date of April 1953.

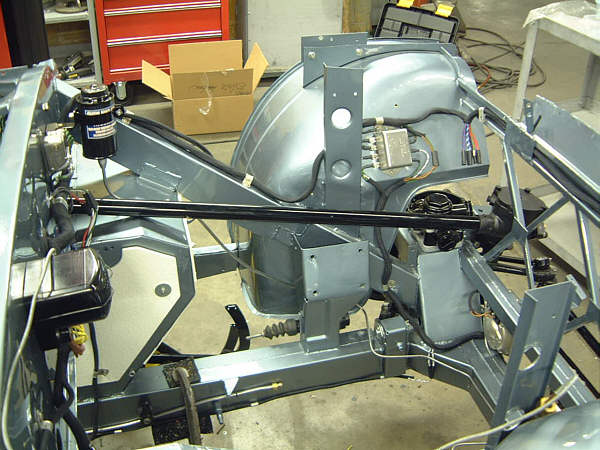
Now more of the components are assembled, and the body panels are now being placed onto the chassis for final attachment and fit-up. The doors and the boot are fitted as the rear shroud is fastened into place with solid rivets along the back seams.
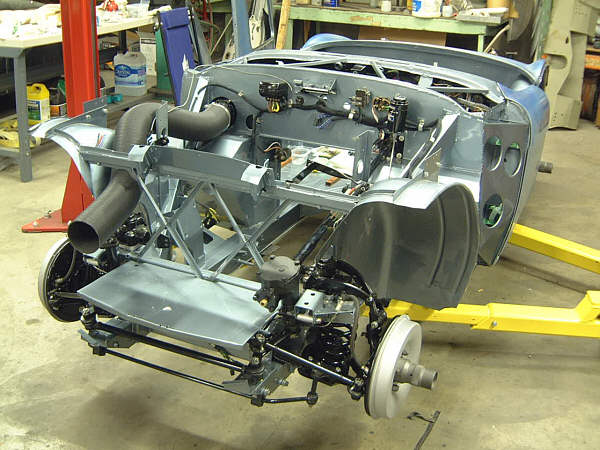
At the front end the last of the components are attached in preparation for the installation of the engine.
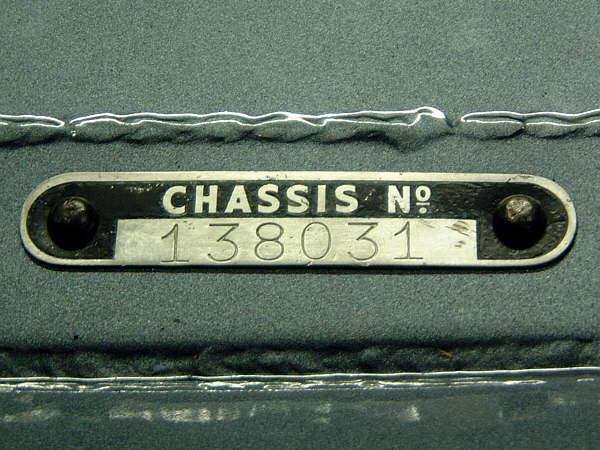
Chassis Identification Plate #138031 is returned to its original location on the frame.
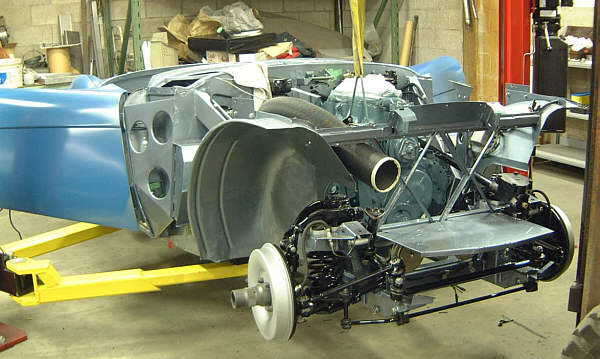
The engine and transmission are fitted in place. This stage was delayed while the overdrive was being repaired. Everything went easy and the remaining engine components will be re-attached after the body painting and upholstery stages.
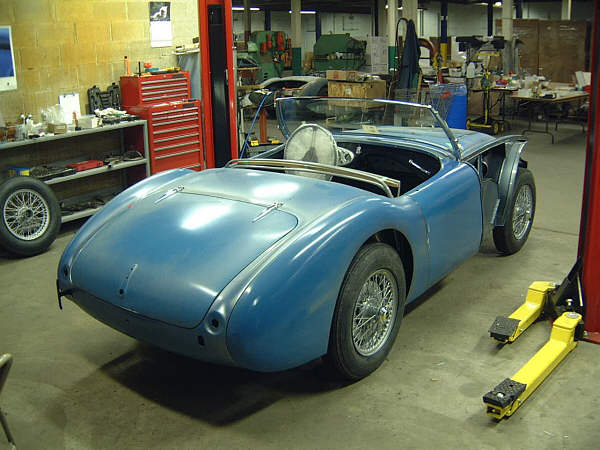
The early style wheels were all rebuilt and restored by Dayton Wheel. The new tires were mounted and then installed onto the car. For the first time in a long time, the car was back on its wheels.
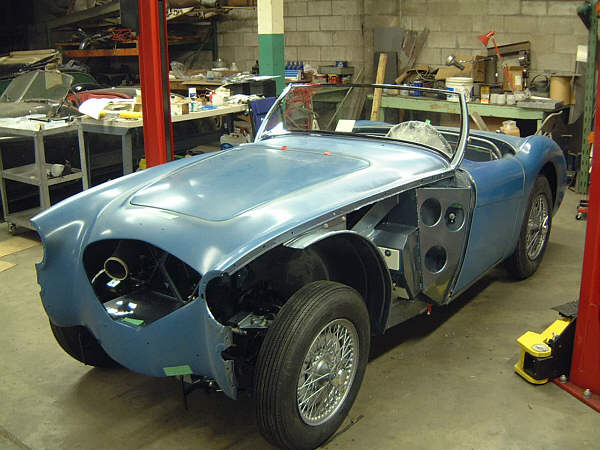
The windshield frame with its new glass was fitted onto the car. Other components such as the transmission tunnel and the hood frame were also checked for fit-up. The car is now ready to load onto the trailer and go back to QRS for final painting. It should be pointed out that the darker blue colour is only the primer. The final colour is the ice blue metallic similar to the chassis.