Work progresses on the Nash Healey Lemans coupe. The dashboard conversion to right hand drive is largely completed and the body shell ready for some painting after trial fitting all of the drive line. The painting on the car will take place in 3 parts largely because I'm doing much of the work on the car in my spare time, so it is sometimes slow progress. After Jerry Mlinaric repaired the outer and inner body the outer body was epoxy primed to protect the bare steel. Now that the drive line has been fitted and checked along with the other modifications completed all of the inner body can be painted. The outer body will be painted later once all of the mechanical installation is completed. That way there is less chance of any damage to the paint during assembly. The outer body on these cars was the only part in color, everything else was black.
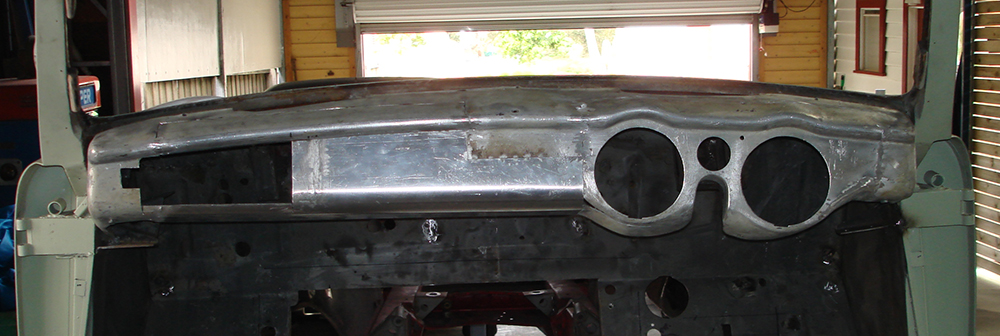
Trial Fitting the dash in the car, all of the mounting points still line up.
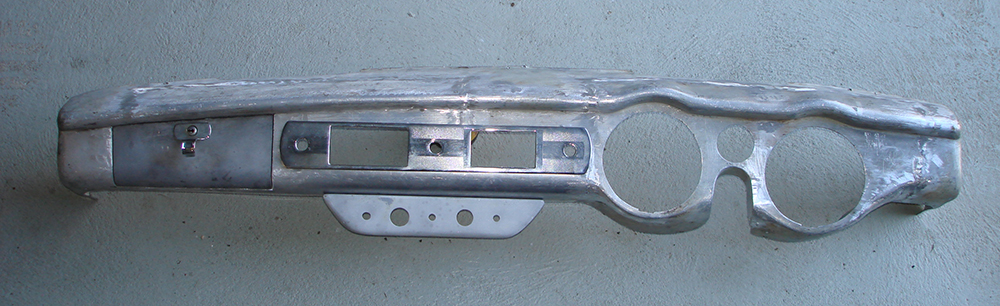
The completed dash, with new opposite hand glove box door. It still needs final panel beating and file finishing.
The body shell back at the Healey Factory, it has been sandblasted inside and underneath. The sandblaster was very thorough and didn't cause any damage.
Shown above the black areas are epoxy primer, and damage to the bottom of the chassis rails has been lead filled
Rear view in epoxy primer stage. At this point I spent a couple of days at The Healey Factory seam sealing all overlapping joints. I used black Sikaflex for this, it is a long slow tedious job but will ensure the car lasts long into the future.
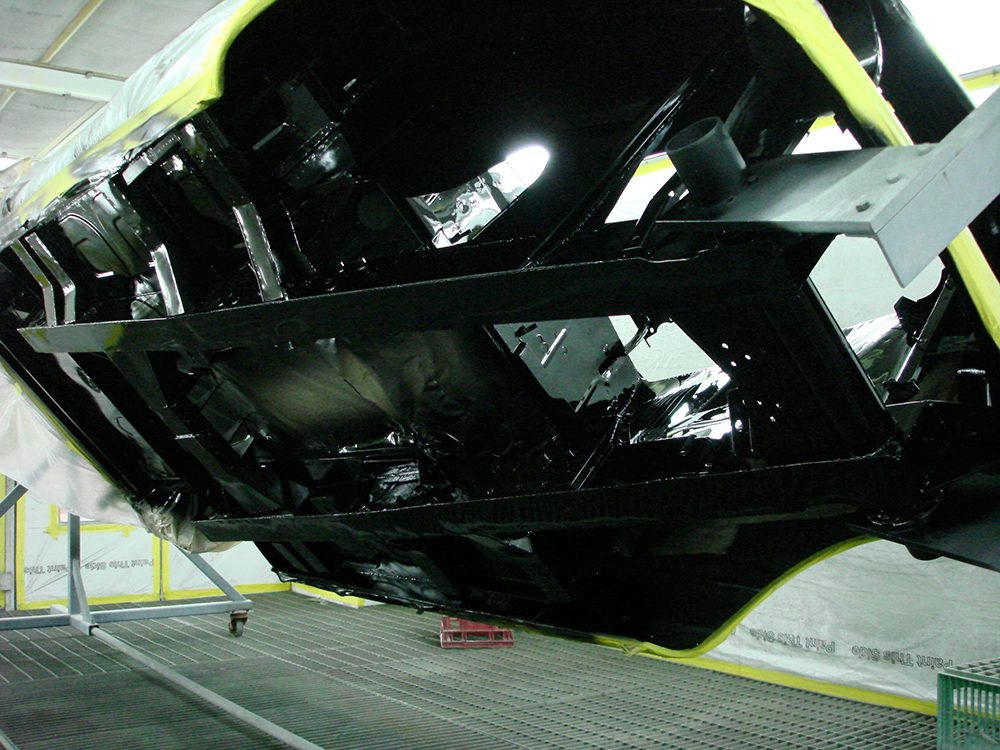
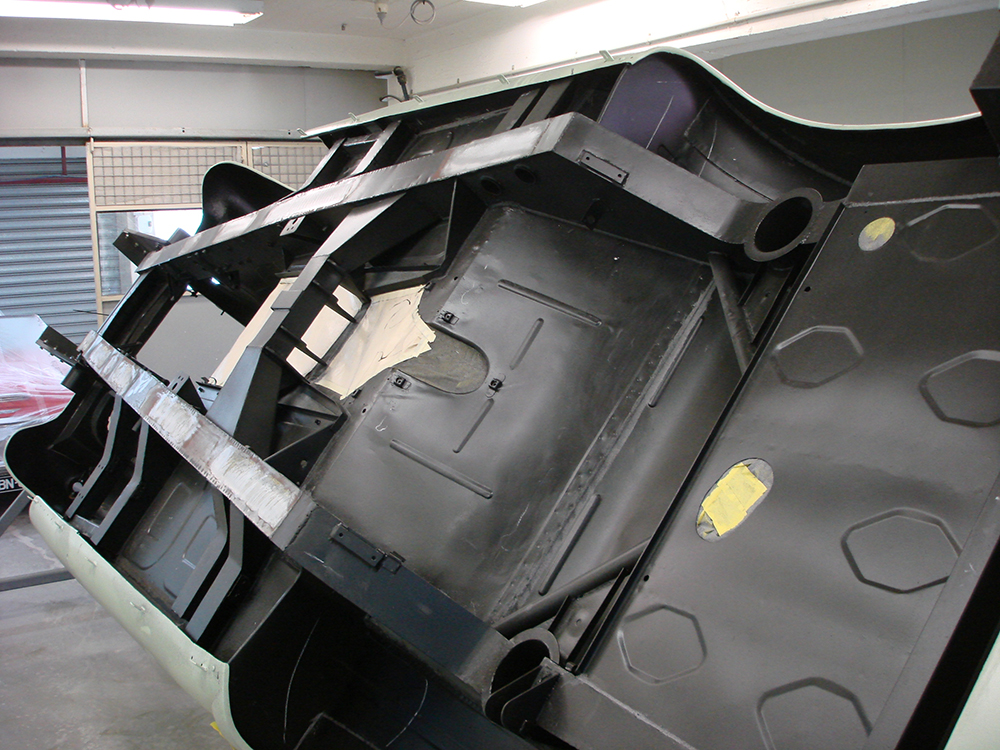
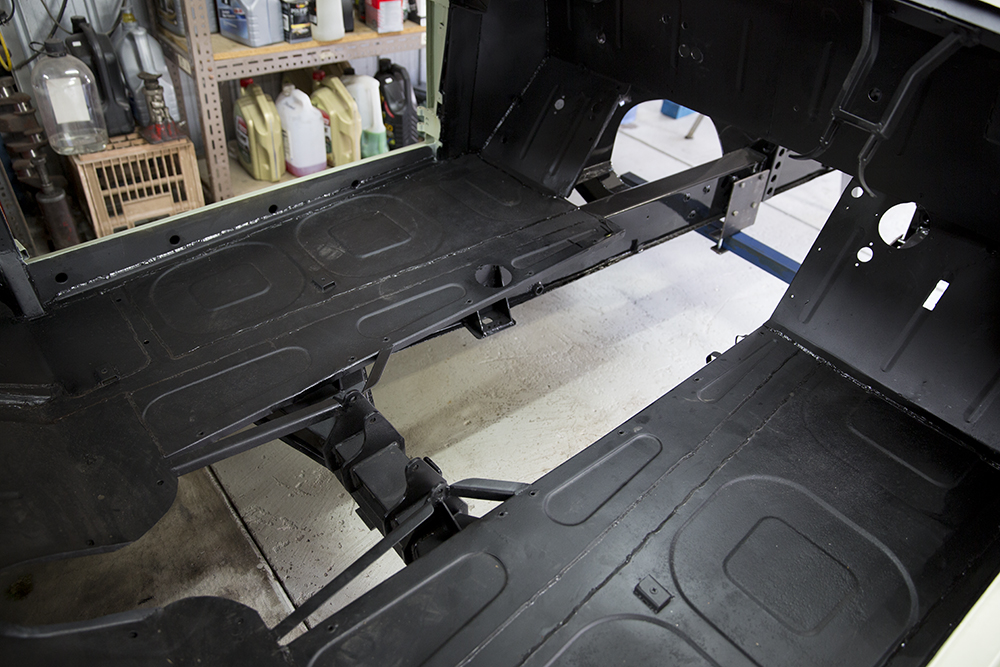
The underside now in gloss black. Originally this was a satin finish where there was any paint at all, and there wasn't much. The Healey chassis were supplied in red oxide primer but there wasn't much paint used on the body and inner body Farina parts.
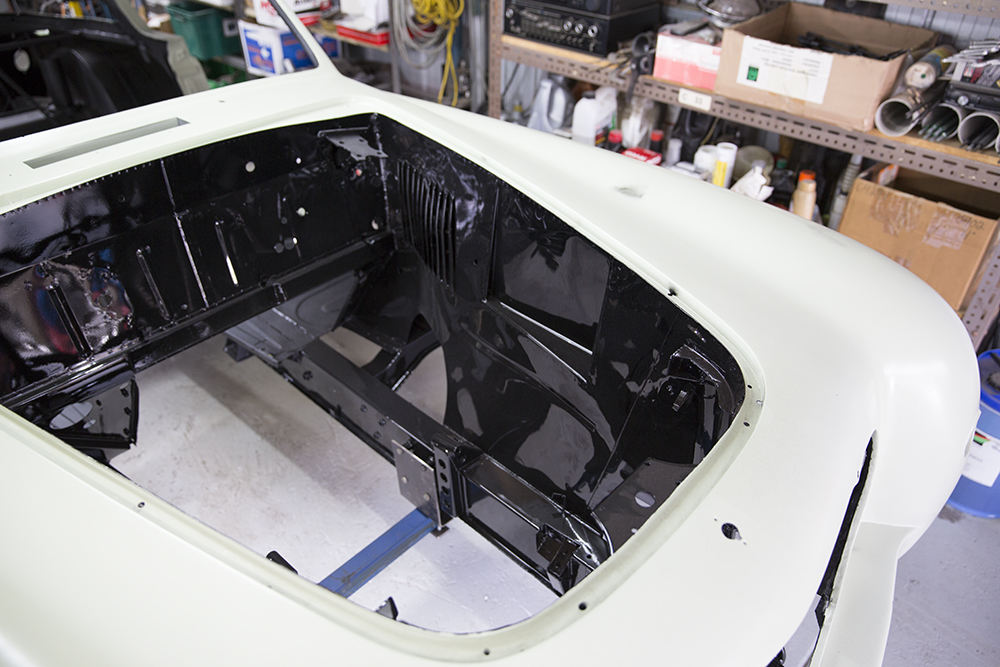
The engine bay in gloss black
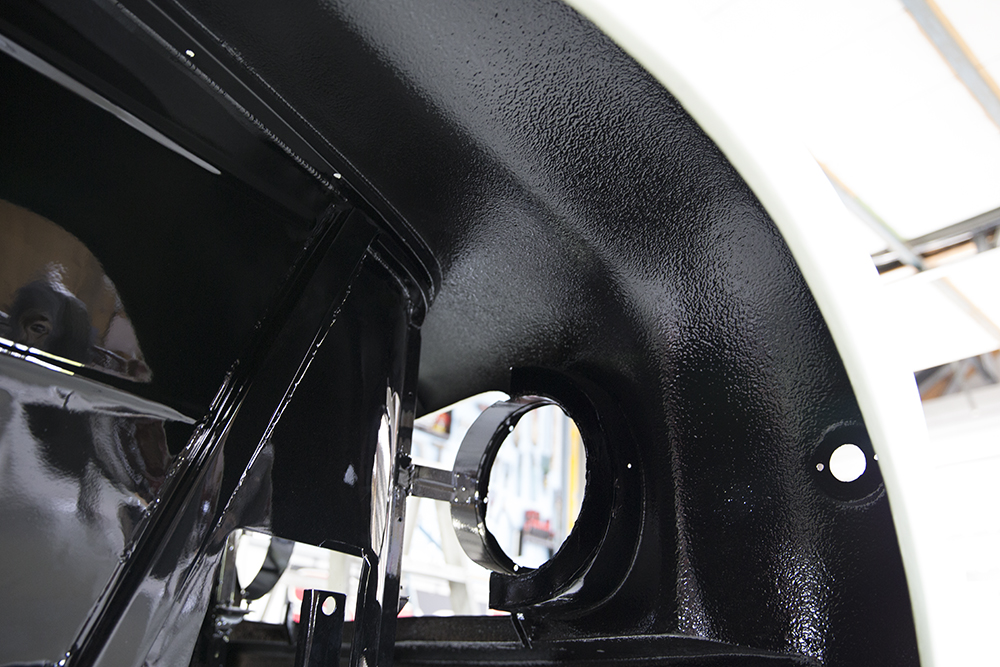
Black ripple finish was applied over the paint to protect the guards from stones, this was also done to the rear inner guards where it will also act to reduce noise.
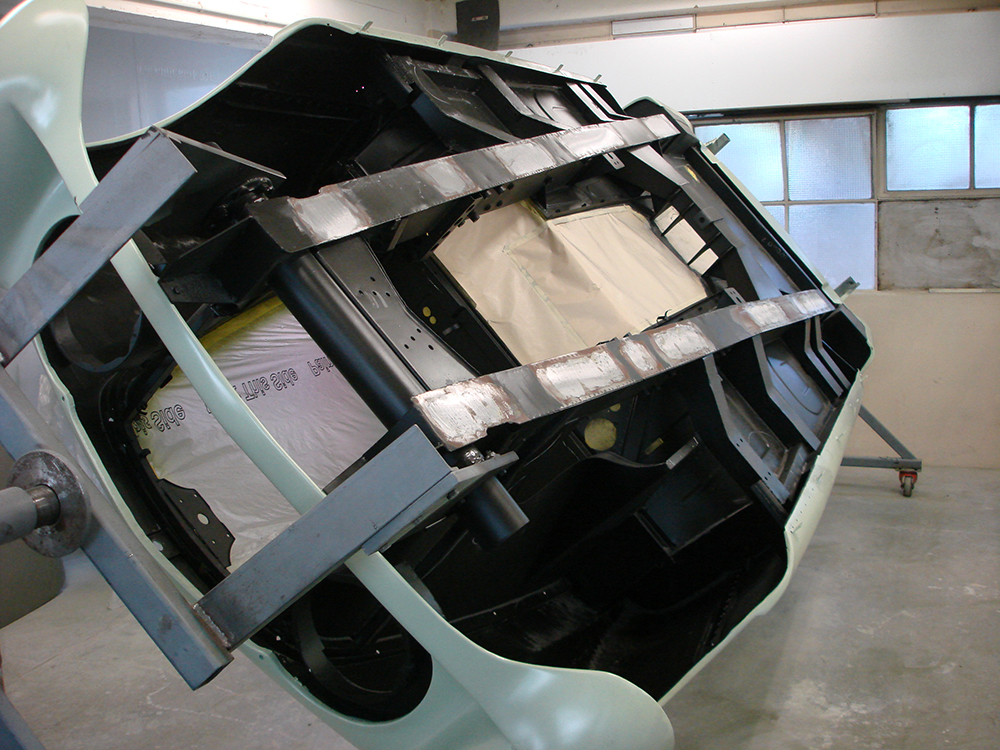
Black epoxy primer on all of the interior, all of the overlapping panel edges sealed with black Sikaflex
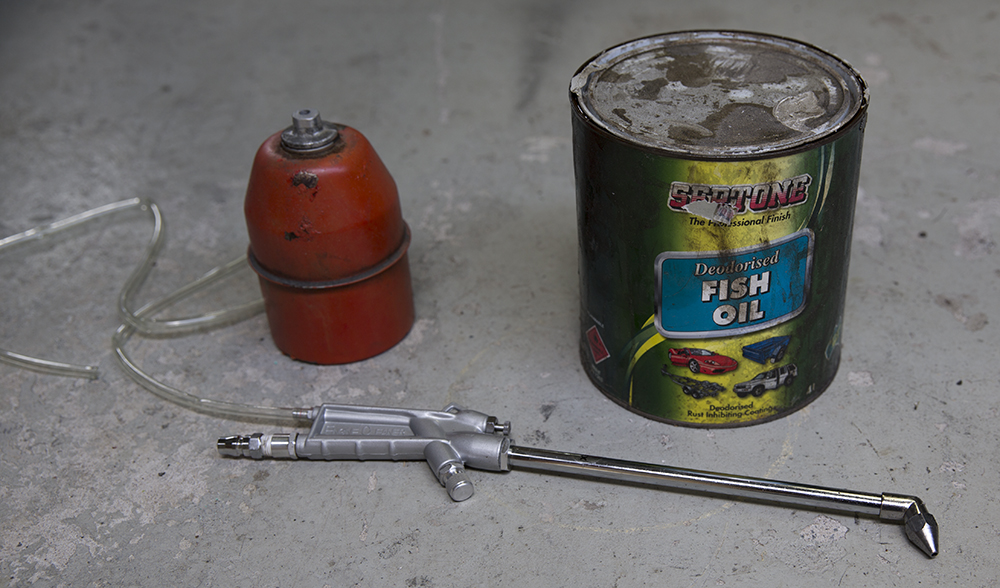
Fish oil, this is great stuff but a messy job. Inside the chassis rails, outriggers and sills have been sprayed using a cheep engine de greasing gun. I drilled 5/16 holes in place where I could close off the hole with a grommet. Using a gun like this creates a fog of fish oil and air inside cavities so that the steel is well protected. Even the de odorised version stinks so don't use the standard version.
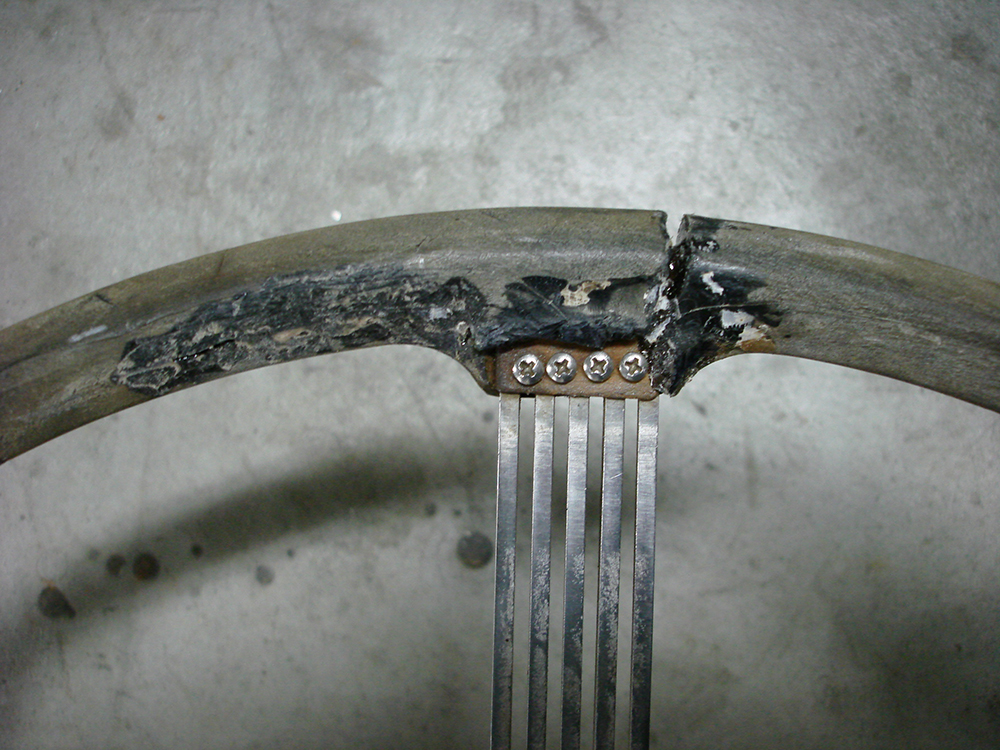
Steering wheel repair, I have drilled and tapped between the spokes to properly hold the spokes to the rim. The original design was quite poor as not much more than the plastic held everything together.
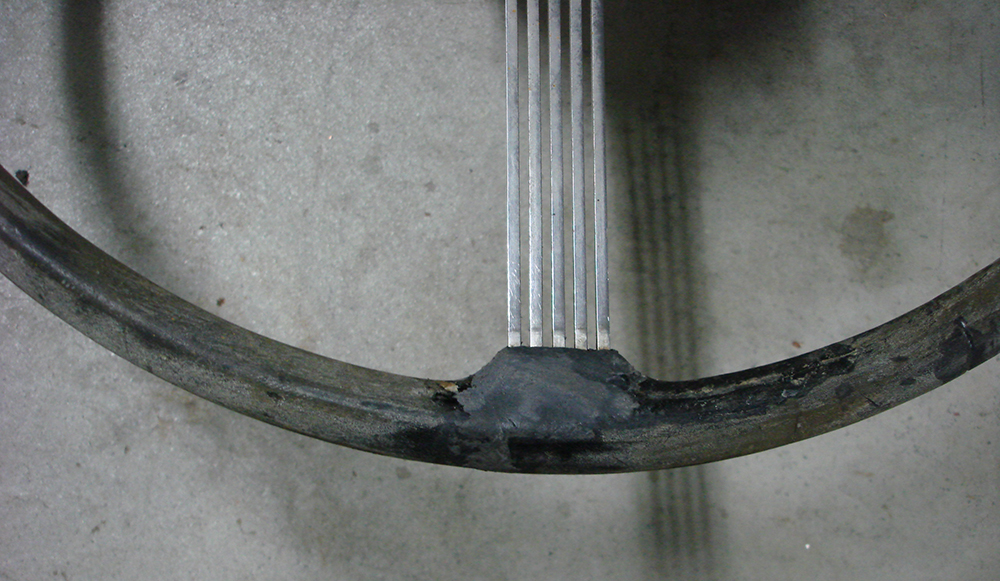
The area between the spokes and the rim filled with a 2 pack epoxy paste, after this all cracks in the rim were ground out using a thin disc in an angle grinder. The cracks were ground out all the way down to the inner steel ring and filled with a 2 pack liquid epoxy glue. I have found that the best method is to pour the liquid into the cracks then bandage over the area with PVC tape this helps force the glue into the cracks and comes off easily after the glue is set.
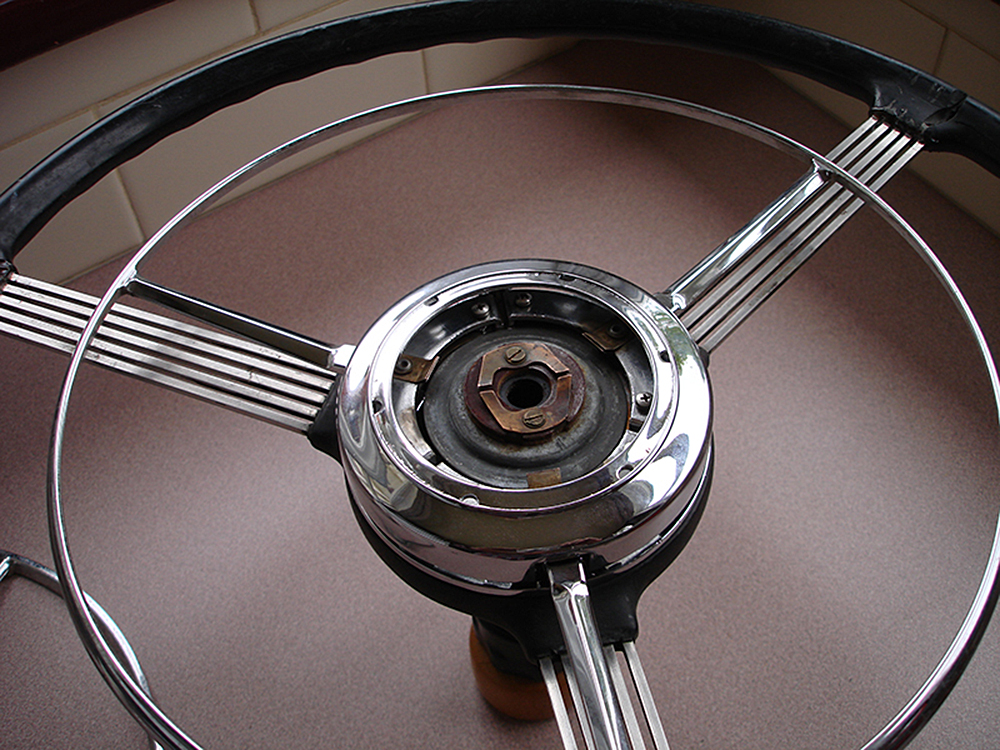
Nash Healey steering controls
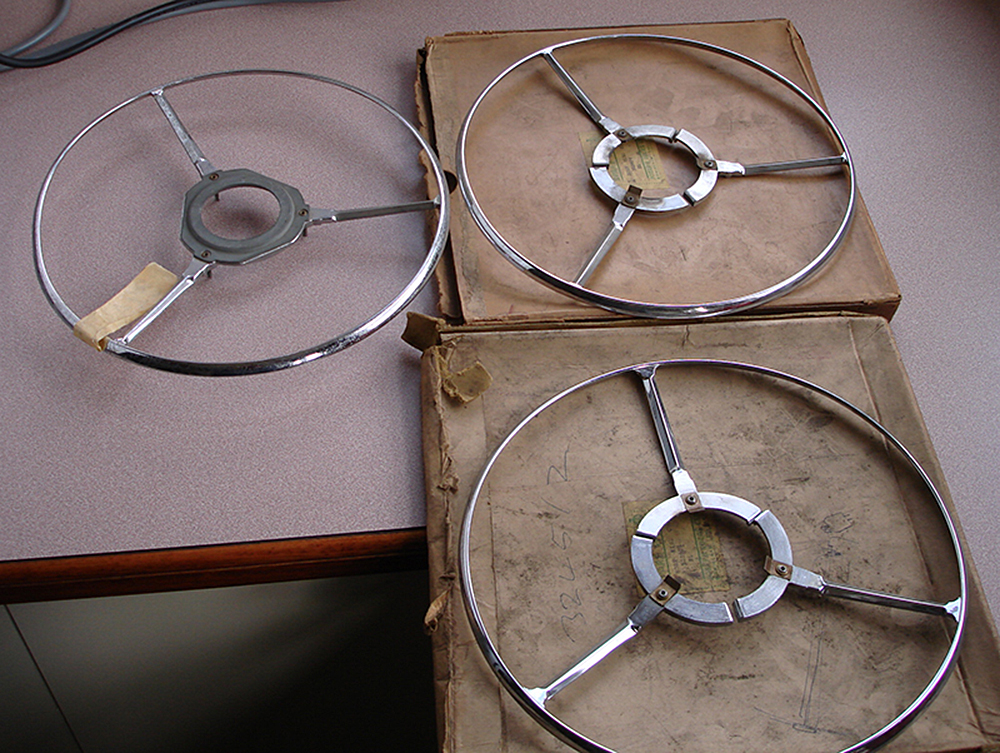
While my car was away being sandblasted and painted, Paddy Greenwood from the UK started a discussion about the steering wheels and steering controls for these cars. He did a lot of research on pat numbers from old catalogues, as well as looking at period cars to try and work out if the parts were available from other cars. He found that the Austin Sheerline and A90 Atlantic looked to be the same, so the hunt began for parts. It soon turned out that they were also hard to find for those cars as well. I found parts in both the UK and Australia, and even an original NOS Nash Healey horn ring here. How it came to be in Australia when the cars never came here, I have no idea. It soon became apparent that the Sheerline parts were slightly different in the way the horn operated, and I figure that the Nash Healey system was a later improvement to the original design. Below you will see how it all played out.
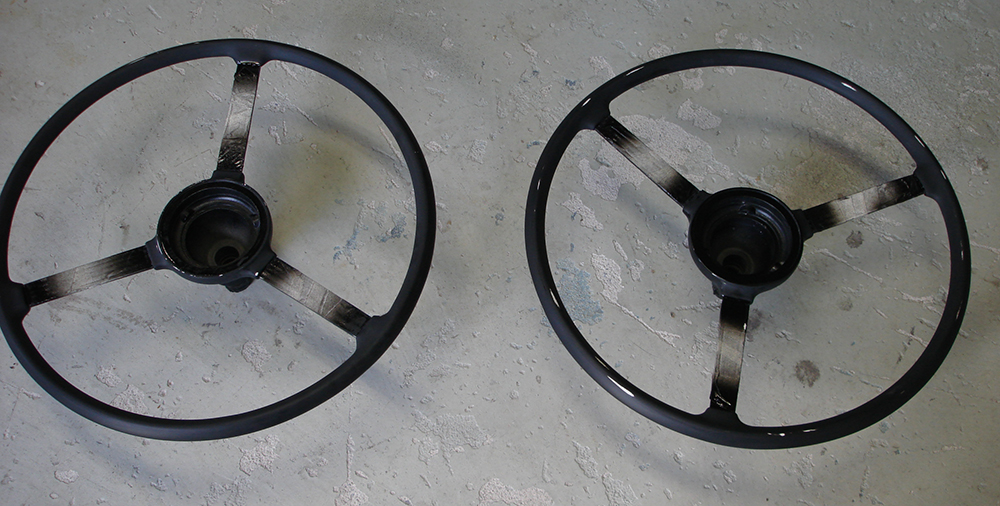
My 2 repaired steering wheels ready for a final coat of gloss black 2 pack.
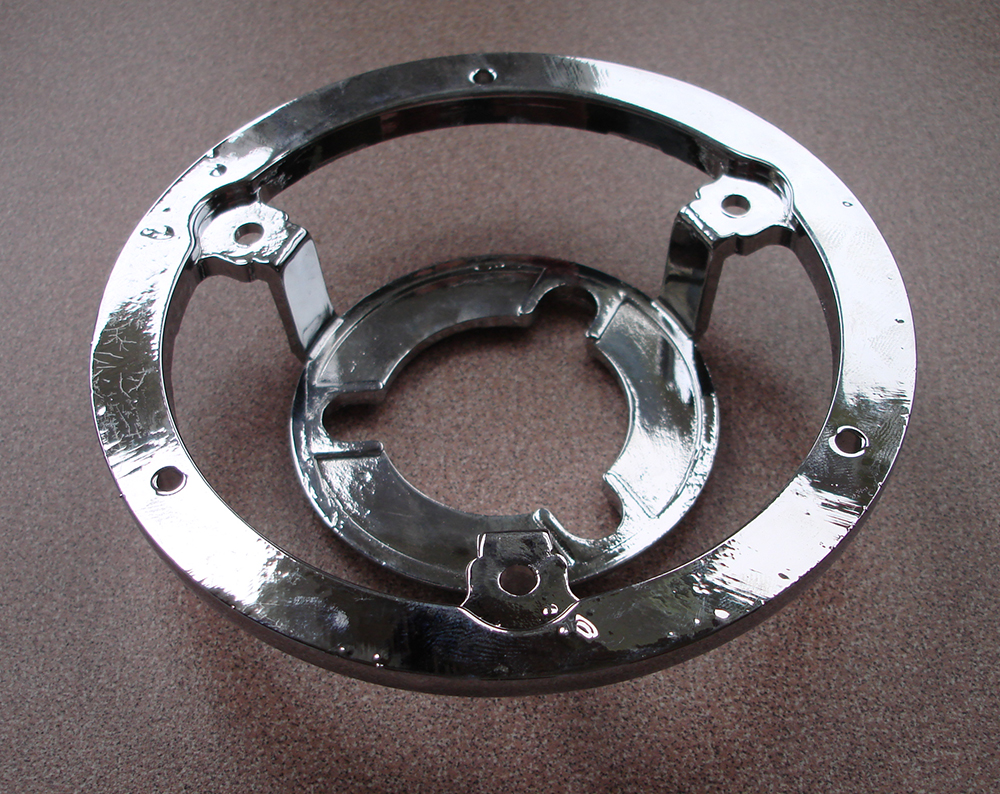
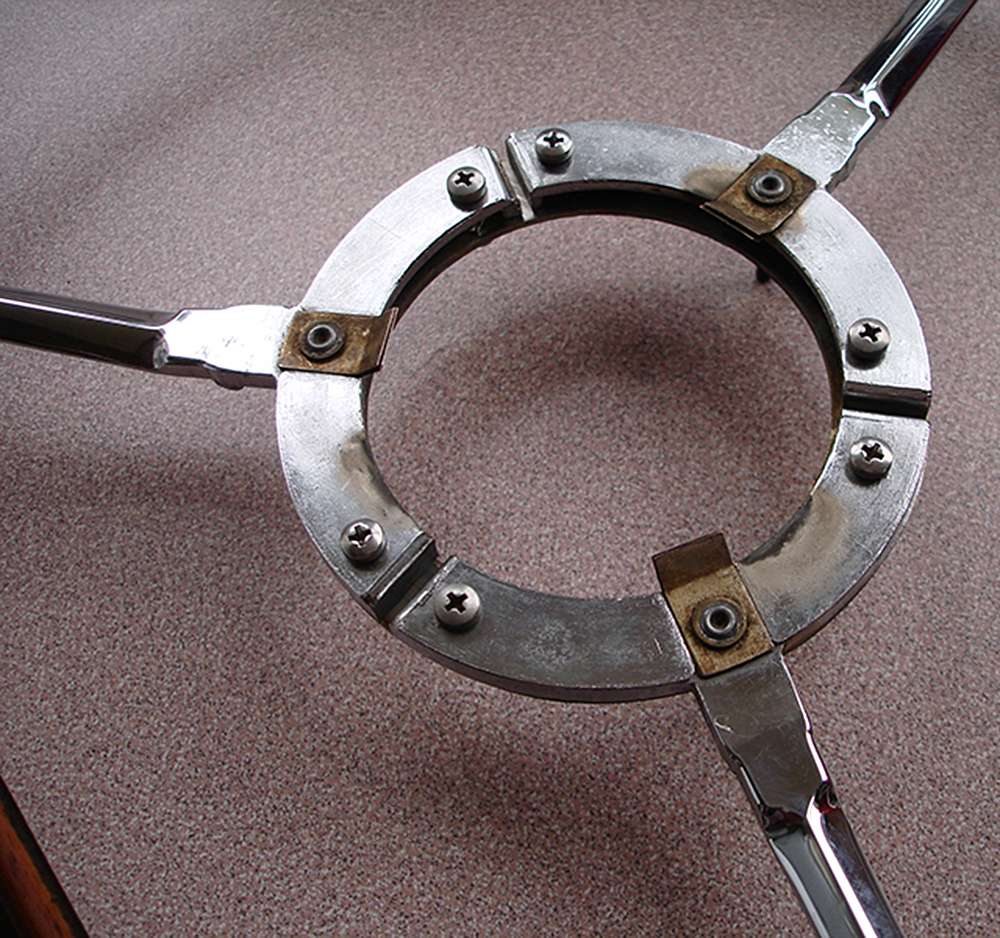
The steering control support casting re chromed.
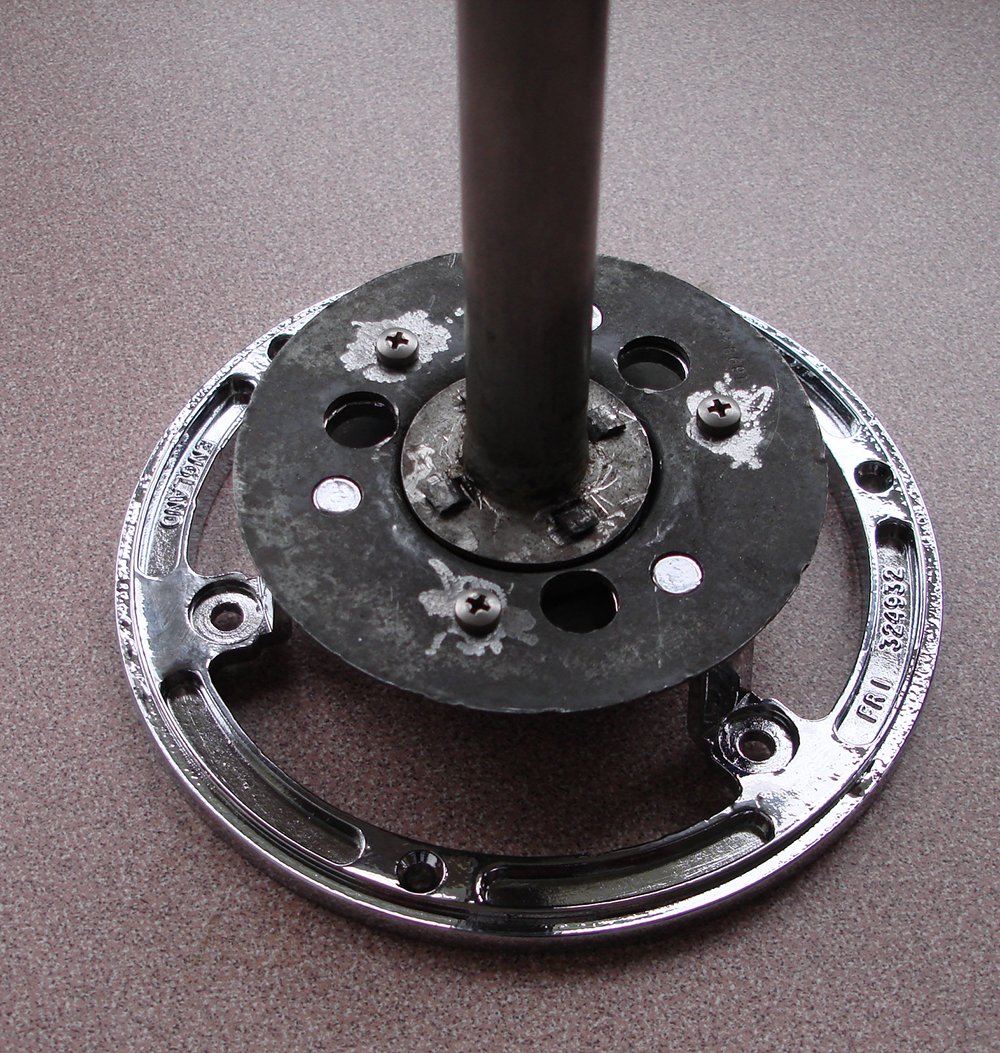
Stator tube remounted after chrome plating the support casting. Originally the casting itself was riveted over to hold it to the metal plate. It has been re installed with stainless steel screws, and the casting tapped to suit. To dismantle the 4 small steel tabs seen above folded over must be carefully lifted then bent back over on re assembly.
New old stock horn rings I found in Australia, upper left is Nash Healey the 2 on the right are Austin Sheerline / Austin A90 Atlantic. The horn ring from my car has had 1 sector cut out of it to provide a better view of the dash instruments, so now I have the option to return it to original. The Sheerline units will be modified to suit the Nash Healey. Other than the center the Sheerline rings are exactly the same as the Nash Healey unit.

The correct Nash Healey horn ring in place.

The Sheerline horn ring in place before modification
I made some stainless steel rings with stainless screws silver soldered in place to support the Sheerline horn ring.
The Sheerline horn ring attached to the mounting ring
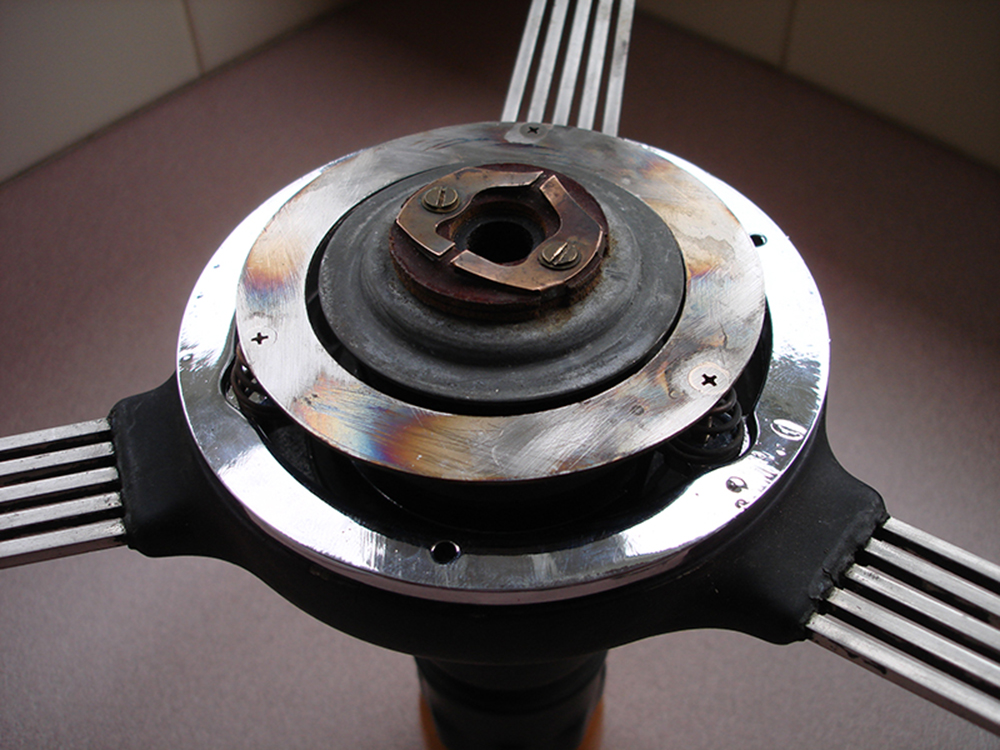
The completed horn ring in place with a Nash Healey cover. The brass contacts on the Sheerline ring will contact the metal plate as needed.
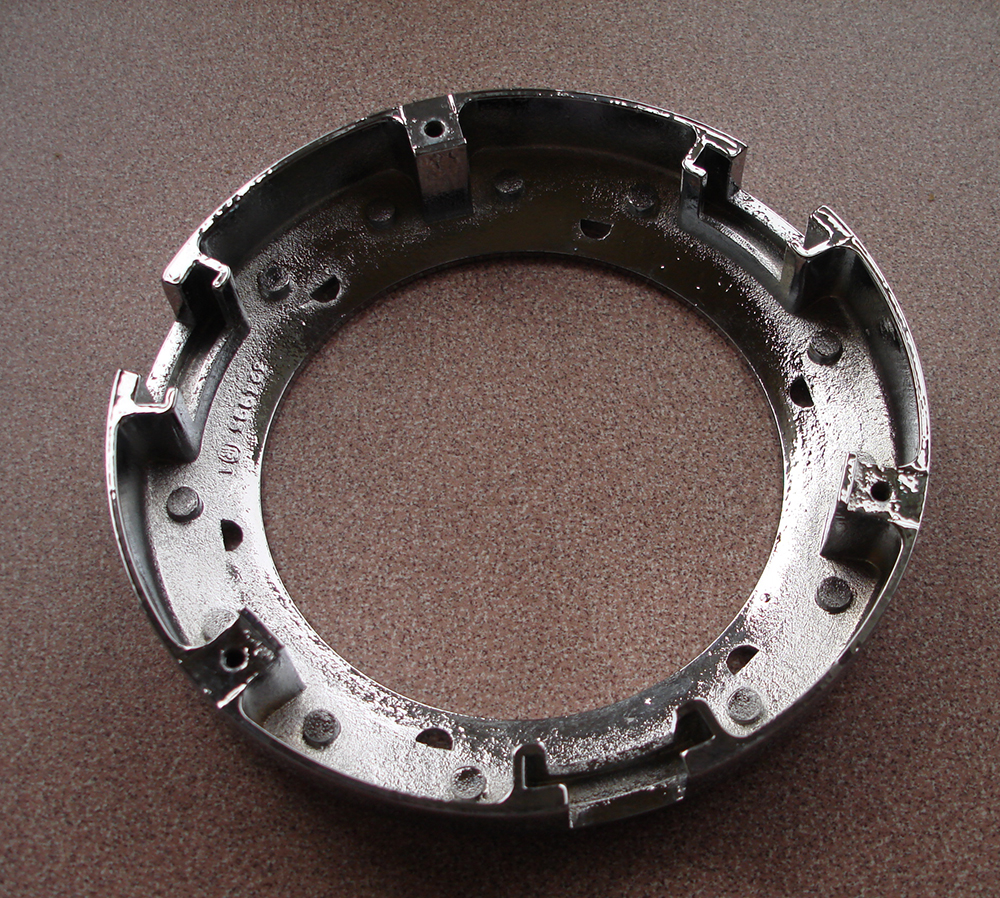
Underside of the Nash Healey horn ring cover.
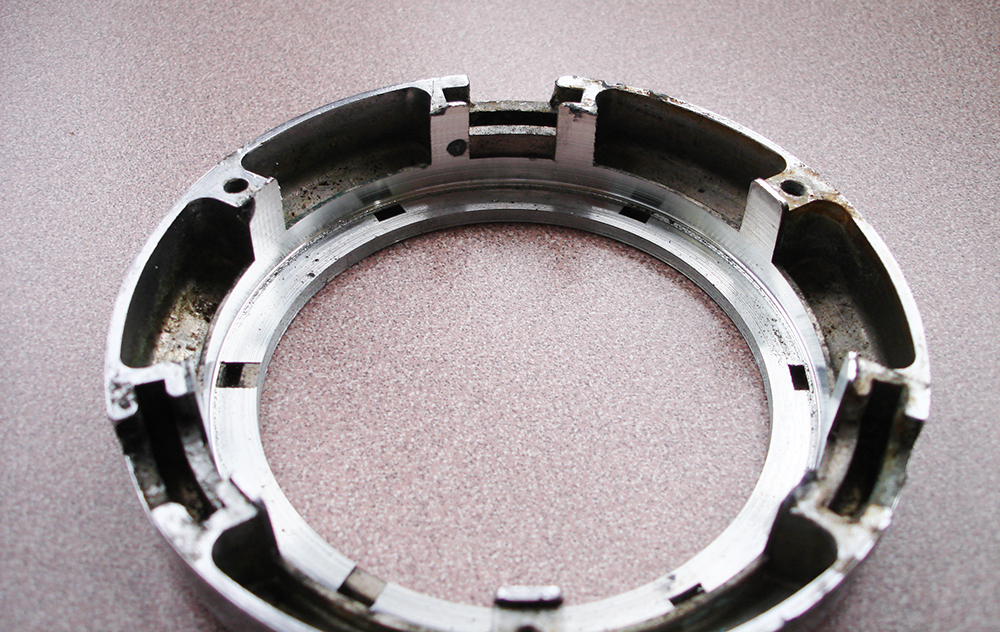
Underside of the Austin Sheerline horn ring cover after initial machining. The center hole had to be increased in diameter and the main bore also deepened. In this image the 3 slots for the horn ring spokes still need to be milled deeper.
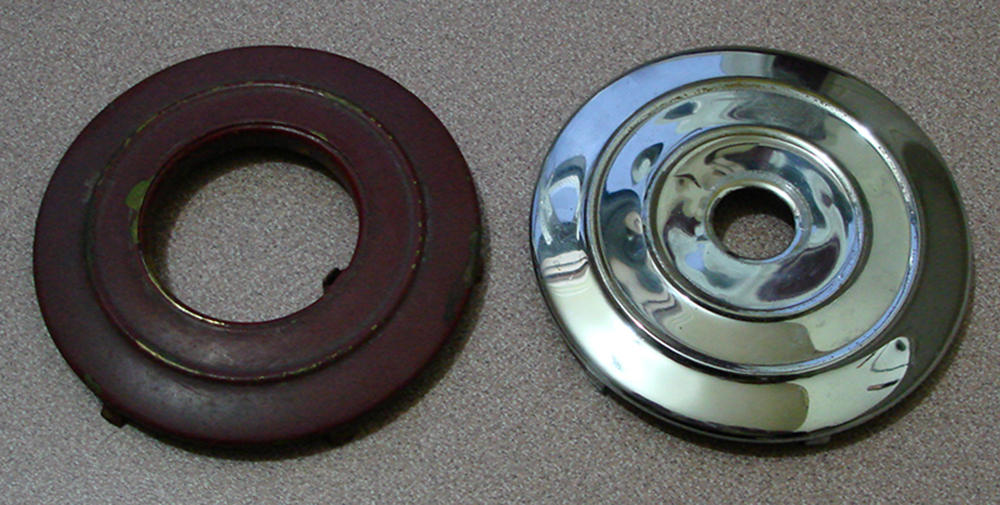
The Nash Healey bezel left, and the Austin Sheerline bezel right.
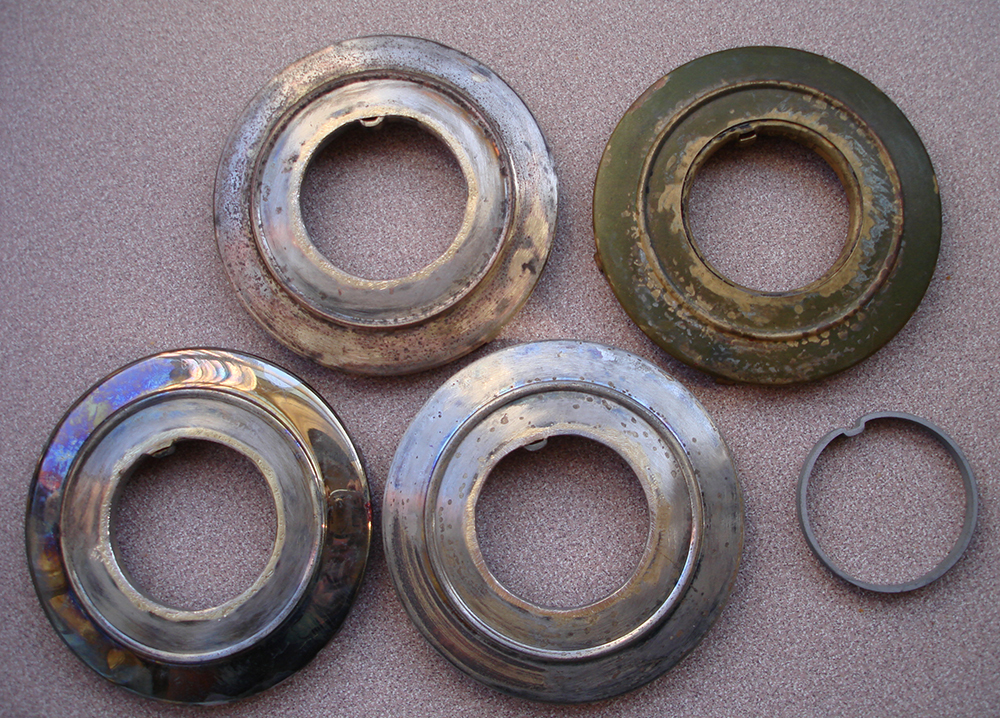
Top right is the Nash Healey Bezel, the other 3 are now modified Austin Sheerline bezels with a steel ring added made out of tube with the notch punched in using a simple punch and die I made. Once painted and the chrome overdrive button bezel is installed they will look exactly the same as the Nash Healey Bezel.
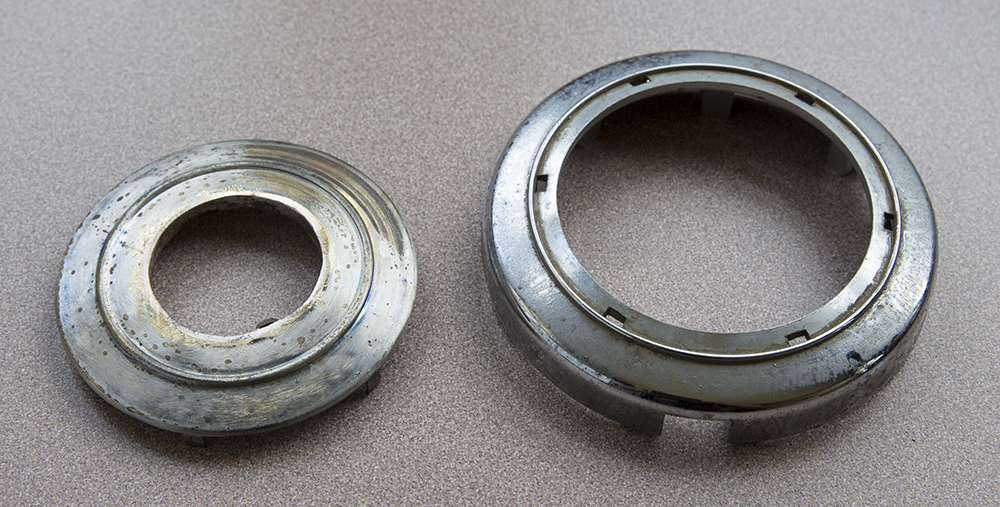
The completed modified Austin Sheerline parts
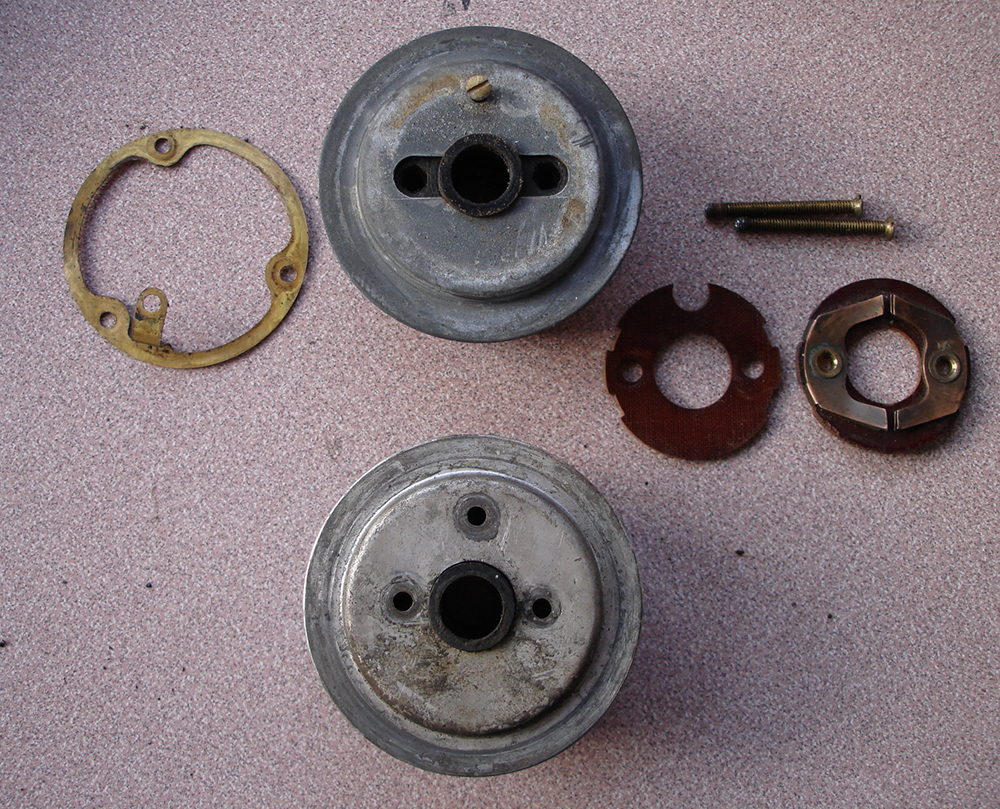
At the top is the Nash Healey contact block, a Phase 2 Standard Vanguard shown below. If you look closely at the slotted area on the metal plate on the Nash unit you can still see the scribing lines where the plate was manually modified by Lucas for the Nash Healey system. The slotted area is necessary so that there is no contact between the electrical paths for the horn and overdrive circuits. To make a spare assembly I modified the Vanguard plate, removed all of the indicator components used in the Vanguard and added the brass contacts used in the Nash for the overdrive. I had spare brass contacts from old Austin A40 / Austin Healey controls.
Nash Healey parts needed
1 x Nash PD front parking lamp
3 x Spacer front parking lamp to fender 3117314
2 x Nash PD front parking light lens
1 x headlamp retaining rings
2 x dome light lens
2 x license plate lamp
1 x rear windscreen stainless steel trim
1 front windscreen chrome trim
1 x door key lock
1 x boot lid handle and lock
2 x interior door handles
1 x window winder handle
5 x interior door handle escutcheon sets
2 x exterior door handles
1 x fuel filler door
1 x front windscreen interior alloy molding bottom and sides
1 x grill badge chrome surround
1 x Nash Dual Jetfire engine complete with all accessories including generator, starter, distributor, water pump and Carter carbs. Iron head version ok.
1 x Rear vision mirror
2 x rear wing dummy vents
Page 15
Home